Authenticating your domain with CampaignMonitor and WHM
I use Campaign Monitor a lot for clients in both a freelance capacity and in my role as Senior Developer, and often find clients asking how they can get a higher open rate or that their friend, Marjorie, cannot find her most recent newsletter. This normally involves me reeling off the same old spiel about ISPs, email clients etc etc.
So it was with some interest that I found Campaign Monitor’s post on email authentication. Whilst it may not be the panacea my clients lust after, it has got to help, so I went about trying to install it on my HostGator reseller package for all my clients.
With no success.
The fundamental problem here was that Campaign Monitor haven’t given many examples of how to set it up, and no examples for how to set it up on WHM. So, with Hostgator’s wonderful customer service, I managed to work out how to do it myself and I thought I should share.
Step 1 – get your records from CampaignMonitor
Go to your admin area. Choose the client you wish to start with. Click “Client Settings”. Then click “Add a domain to authenticate” near the bottom of the screen.
Next up, enter your details in the box, remembering to leave out the http:// and the www. from your domain name / URL.

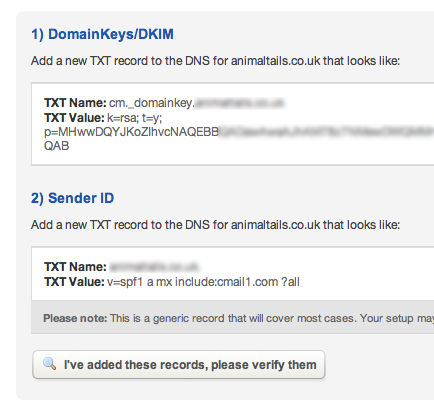
Then click “Genereate DNS records”. Campaign Monitor will give you your records, which will look something like this:
Keep this window open, as we’ll be needing these in a jiffy.
Step 2: Adding the records to Web Host Manager
Now, here’s where I messed up before, as there were two vital pieces of the puzzle I was missing:
- All TXT values are encapsulated in double quote marks.
- For one of the key names, you need to take off your domain name (?!)
So, now we’ve found those pieces of the puzzle from down the back of the sofa of the web, let’s crack on.
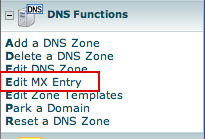
Add your DomainKeys/DKIM – login to your WHM – ( usually whm.yourdomain.com ) and scroll down the page. You are looking for a left hand nav element called “Edit DNS Zones”

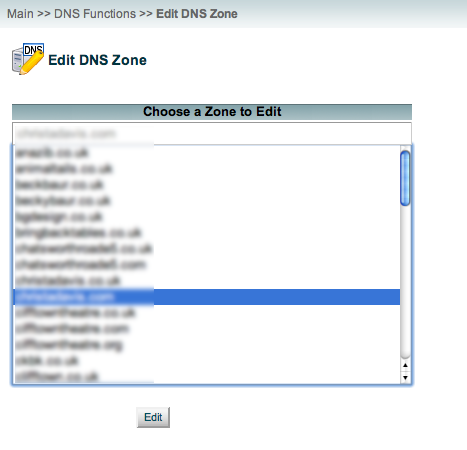
Now, choose the domain you entered in CampaignMonitor earlier and click edit:

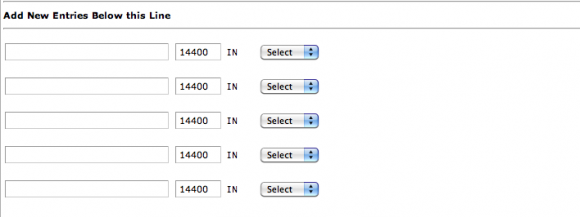
You should now be presented with a page of DNS entries. As we’re adding entries you want to scroll to the bottom, where you will see a section called “Add New Entries Below this Line”
So, now go back to your Campaign Monitor page (you did leave this open, right?) and copy the TXT Value. We don’t need the TXT Name as it’s going to be easier for us to type these ourselves. Now go back to your WHM screen. In the text input box, type just the words cm._domainkey – no spaces, no extra dots, no mention of your domain name, just cm._domainkey
From the select dropdown, choose TXT, and in the text input box that magically appears, paste your TXT Value encapsulated by double quotes.
In the next row of boxes, we are going to add our Sender ID, so let’s go back to the Campaign Monitor page and copy the Sender ID TXT Value.
Back to the WHM page and let’s add our first field, which is going to be your domain name with no http://, no www. and an extra full stop at the end. So if your domain is http://www.google.com, you will enter google.com. in the first box.
Then, again choose TXT from the select dropdown and the paste your TXT Value encapsulated by double quotes.
You should now have something that looks like this:
Double check your entries and then click “Save” at the bottom of the screen. Go back to Campaign Monitor and verify your records by clicking “I’ve added these records, please verify them”. Some hosts may take a little while to refresh this information, but I found that it was pretty much instantaneous for me. If it hasn’t changed after an hour or so, go back to your WHM page and double check for errors – extra spaces, no quotes etc.
The end results
I have yet to send a campaign since the update, so I have no data yet, but I will share the open rates with you once I have them.
Filed under: CampaignMonitor,Email,Hostgator,WHM - @ August 15, 2011 2:10 pm


